Grosse Pointe North ART
  • Home
    • Weekly Agenda
    • Contact
  • Classes
    • How To
    • Computer Graphics >
      • CG 1 Projects >
        • Silhouette
        • ANIMAL Trace
        • PHOTOSHOP tutorial
        • EYE - Digital Illustration
        • PORTRAIT - Digital Illustration
      • CG 2 Projects >
        • CARTOON Trace
        • PRODUCT Trace
        • SELF-PORTRAIT
      • CG 3 Projects >
        • Maggie Taylor
        • FOOD TRUCK Concept
  • Events
  • Student Work
  • Blog
  • ART Schools
    • Michigan Schools
    • National Schools
    • Canadian Art Schools
  • ART Careers
  • Google ART Project
  • © FREE Images!
  • Non-clickable Page

CARTOON Trace

​

Here you will find the steps to continue your exploration of the PEN TOOL in ADOBE ILLUSTRATOR.
Your OBJECTIVE in this assignment is to familiarize yourself with:
  • The PEN TOOL
  • The WORKSPACE
  • Using TOOLS - such as EYEDROPPER TOOL & LAYERS
  • and SAVING your files

1. PLACE your Reference

  • Create a NEW... > FILE (LETTER is fine here)
  • ​PLACE YOUR IMAGE
  • Adjust your image size to fit your ARTBOARD or use your ARTBOARD TOOL to adjust size
  • I like to SAVE at this point

2. NEW LAYER & Closed Shape

  • Create NEW LAYER 
  • Trace shapes with the PEN TOOL
  • Select NO FILL to allow you to see your reference image.
  • Make sure to CLOSE YOUR SHAPE (see image below - You can be sure your shape is closed if you see a circle next to your pen tool)
  • Use the EYEDROPPER TOOL to pick the actual color in the image
  • Remember to SAVE periodically!
Picture

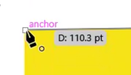
3. PEN TOOL - Curves

  • Create NEW LAYER 
  • Trace shapes with the PEN TOOL
  • Select NO FILL to allow you to see your reference image.
  • Make sure to CLOSE YOUR SHAPE
  • Click and HOLD your left mouse button to "pull out" your curves
  • Click on the last ANCHOR POINT to RESET YOUR CURVE 

4. EYEDROPPER TOOL

  • Make sure to CLOSE YOUR SHAPE
  • Use the EYEDROPPER TOOL to pick the actual color in the image
  • Make sure your FILL is forward in your TOOLBAR to fill your shape (not your stroke)

5. Naming Layers

  • Create NEW LAYER 
  • Get into the habit of NAMING and SORTING your layers!
  • Select NO FILL to allow you to see your reference image
  • Make sure to CLOSE YOUR SHAPE

5. FILL MICKEY'S Face

  • Make sure to CLOSE YOUR SHAPE
  • Use the EYEDROPPER TOOL to pick the actual color in the image
  • Make sure your FILL is forward in your TOOLBAR to fill your shape (not your stroke)

SORTING LAYERS & LINE

  • Easily Name and move LAYERS around to stay organized
  • Release your PEN TOOL to draw LINES - In this case I switched tools to release the pen tool.
  • You can also press Esc on your keyboard to release your PEN TOOL
  • Choose "No Color" for the FILL and bring the STROKE forward and choose BLACK to draw your line

SELECTION TOOLS & STROKE

  • Use the SELECTION TOOL to select all the parts of a path or shape
  • ZOOM in to see small detail
  • Most PANELS have OPTIONS - I selected LARGE ROW SIZE
  • Use the DIRECT SELECTION TOOL to select individual elements like ANCHOR POINTS, PATHS, and re-adjust CURVES
  • ​Open the STROKE PANEL (Window > Stroke) to adjust the STROKE in your design - in this case I chose a tapered PROFILE to better match the original line

EXPORTING as a JPEG

  • Go to FILE > EXPORT > EXPORT AS...
  • Make sure you NAME your file correctly
  • Cartoon_LastName
  • Choose JPEG
  • Choose CMYK
  • MAXIMUM Quality
  • RESOLUTION High (300 ppi)
​

FINISHED TRACE

Picture