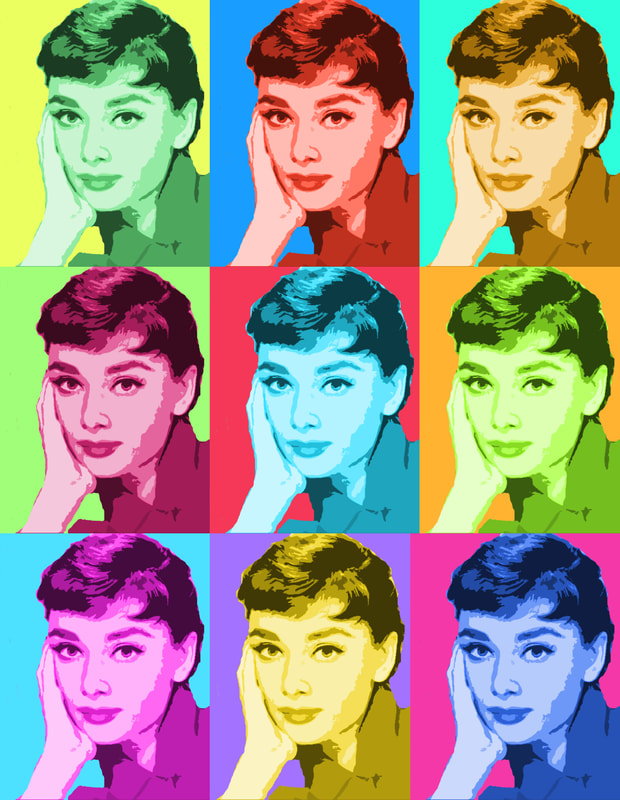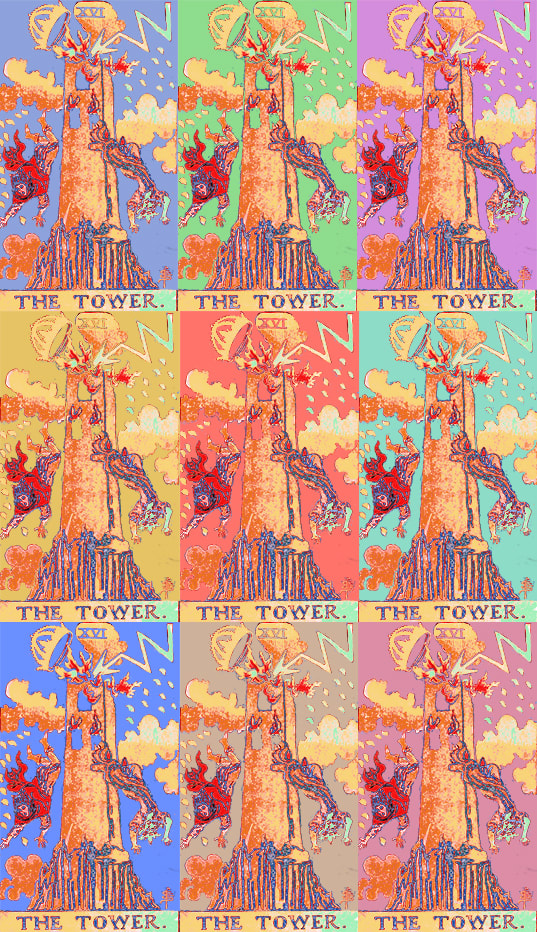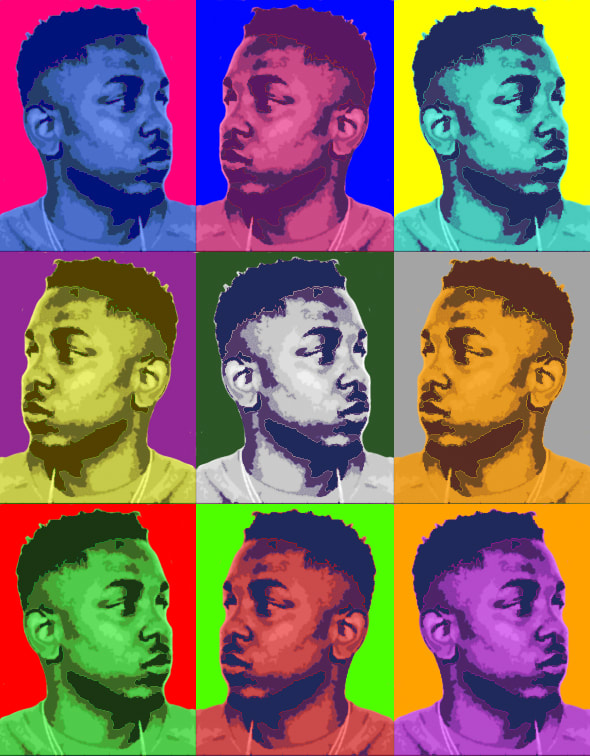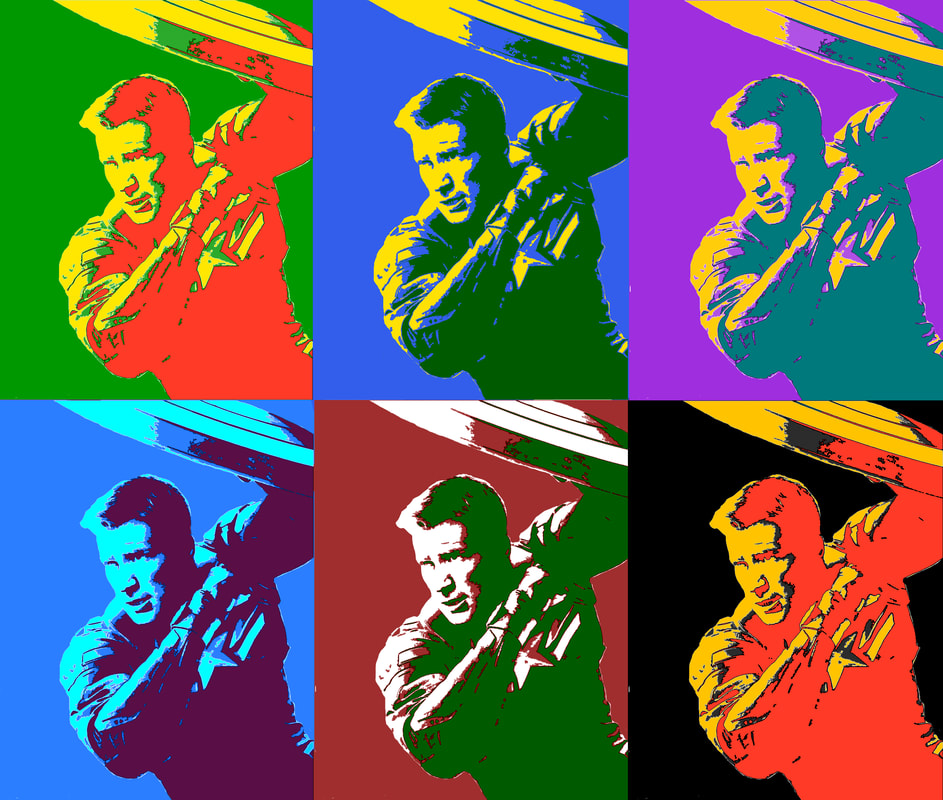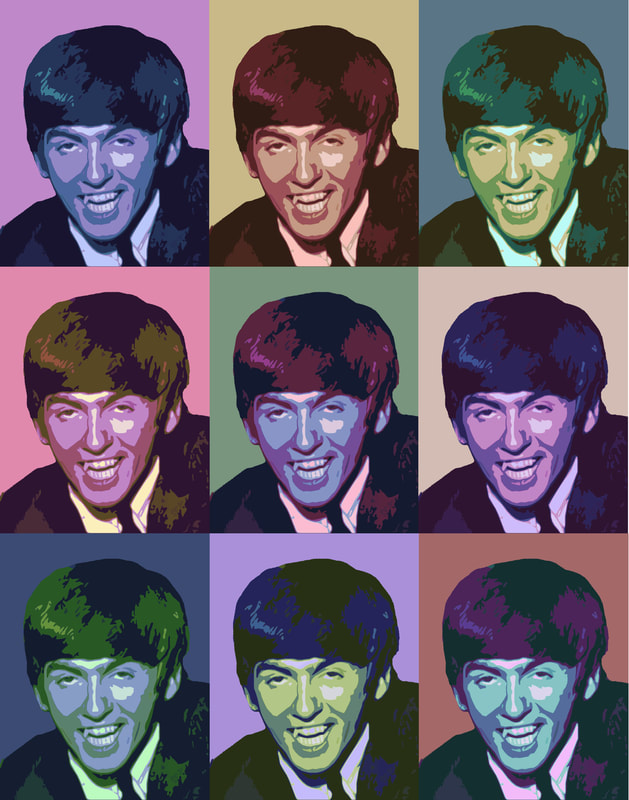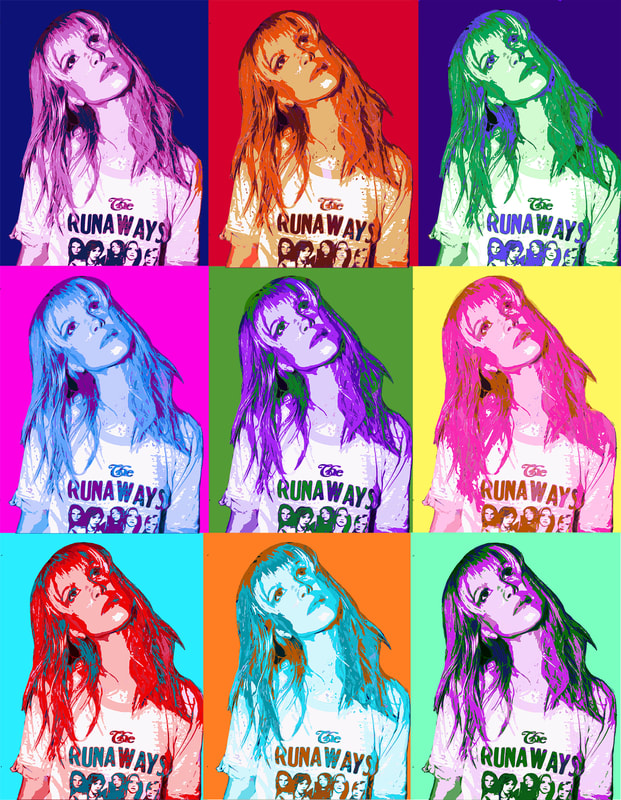
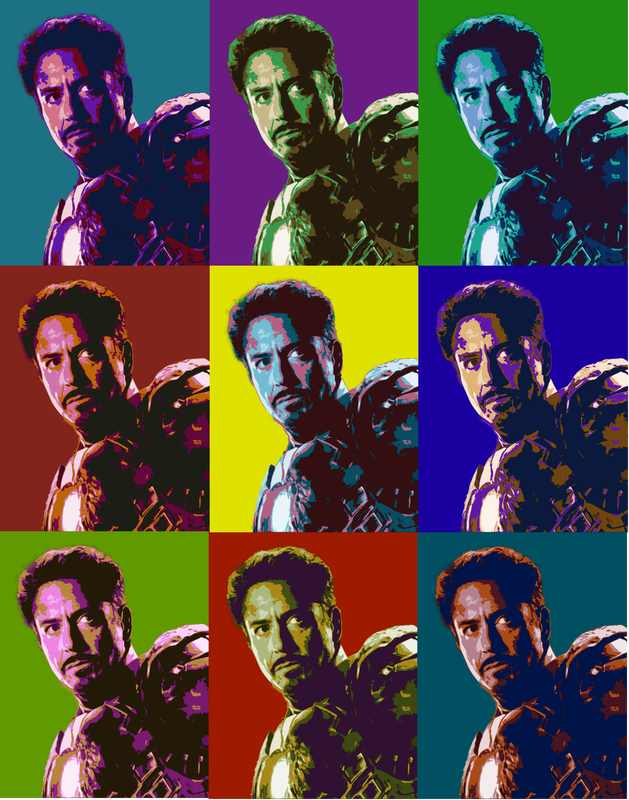
MULTIPLE PORTRAIT ILLUSTRATION
Fine ART
In this assignment, you will be working as an FINE ARTIST to create a multi-image digital PORTRAIT.
Here you will find the steps to create an Andy Warhol inspired MULTIPLE PROTRAIT ILLUSTRATION
|
You will select a portrait image, crop it tightly while keeping some of the background, then (uniquely) color each image several times in the style of Andy Warhol.
Your OBJECTIVE in this assignment is to continue to familiarize yourself with:
|
|
1. HIGH-RESOLUTION IMAGE
|
Search for a HIGH-RESOLUTION image to use for your project - or better yet, use your own photograph for this project!
To find files that have Higher-Resolution,
|
|
2. OR...OPEN your image
|
If you don't drag your image into photoshop directly, you can also open your image into PHOTOSHOP
|
|
3. CROP Your IMAGE
|
Here is where you will CROP your image to a specific size
|
|

LAYER MASKS
|
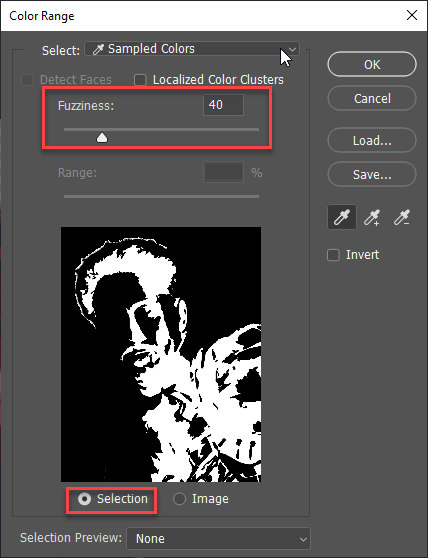
You will be using a LAYER MASK to remove the background of your portrait. Be neat and precise in this step for the best results!
Or you can use:
Layer > Layer Mask > Reveal All to add your LAYER MASK
|
|
Removing the BACKGROUND
|
When you paint with BLACK on a LAYER MASK, the image becomes erased. What's cool is that the information is still there and when you paint with WHITE it comes back. Give it a try! This is an example of
"Non-Destructive" editing |

This is a finished LAYER MASK - look at the small BLACK & White mask in the LAYERS PANEL
|
To finish cutting out the background, you need to APPLY your LAYER MASK - you can achieve this a couple ways...
|
aDUST your IMAGE
|
|
Make your image BLACK AND WHITE
|
|
FILTER GALLERY
|
In this step, you will simplify the image using the CUTOUT FILTER found in the FILTER GALLERY
When you click on Filter Gallery... a new window will open for you to adjust your image with the chosen filter.

|
|
COLOR your Image
|
FIRST COLOR
You will create your first color by using a COLOR OVERLAY
|
|

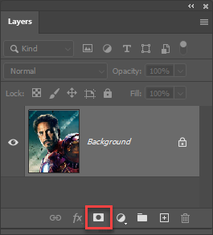
You can also add a LAYER STYLE by clicking the fx button at the bottom of the LAYERS PANEL
|
|
Second COLOR
|
In this step you will add color to the DARKEST SHADOWS
* DARKER COLORS work better in this step.
|
|
Third COLOR
|
Follow the same process as the Second COLOR to add a Third COLOR.
|
|
Background COLOR
|
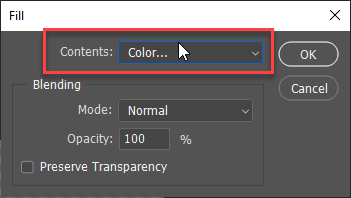
In this step you will fill the BACKGROUND with a solid COLOR
|
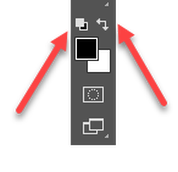
Filling color with the PAINTBUCKET TOOL
|
COLOR Choices
|
Make good COLOR CHOICES!
COLOR THEORY
Knowing color combinations and how they relate to each other will help you choose...
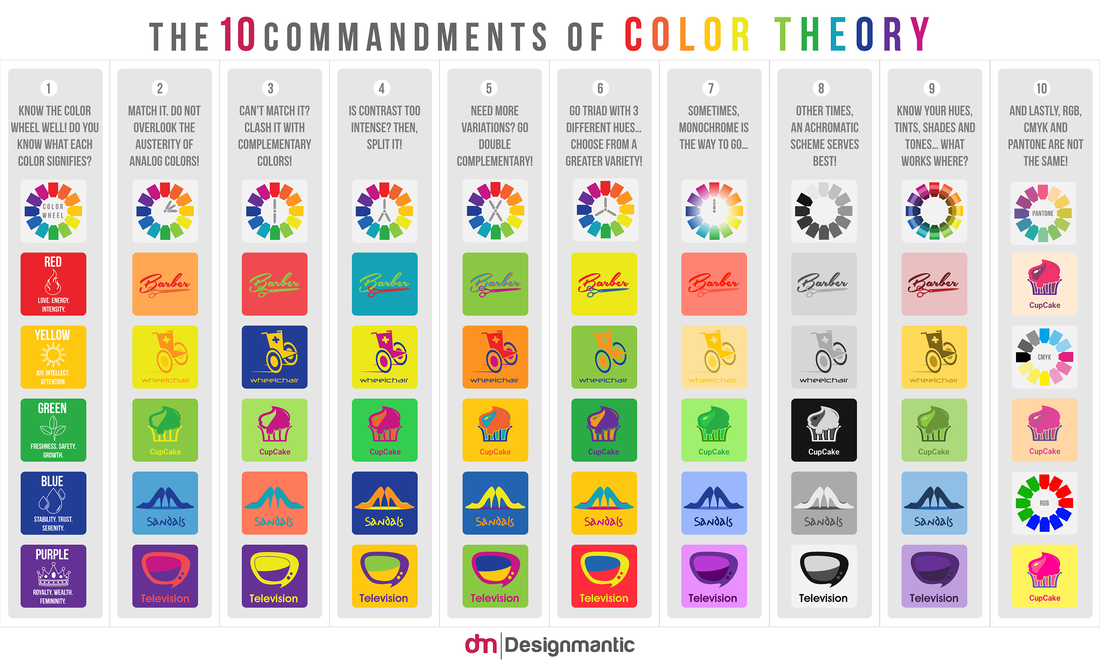
CLICK to ENLARGE
|
|
COMMON ERRORS when using COLOR
|
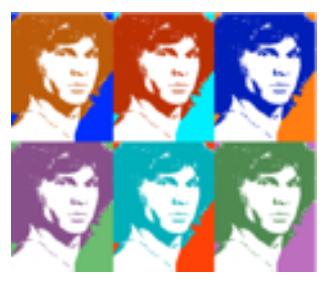
INVERTED TONES - Patches of color that should represent darker shadows are filled with bright colors, causing visual confusion. The top right tile looks correct while the bottom right is awkward.
|
|
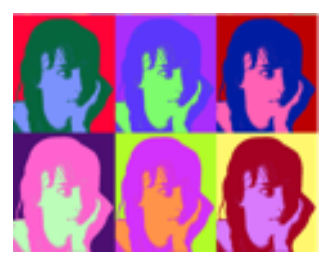
SIMILAR COLORS TOUCHING - The top middle tile's cyan background touches the cyan air of the bottom middle tile. Similar colors should not appear side by side.
|
|
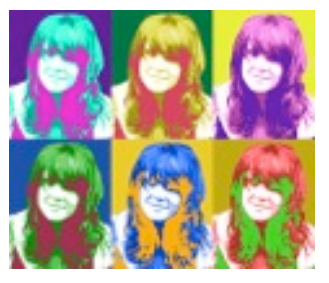
LIMITED COLOR VARIETY - This composition is dominated by violets. A violet hue is used eight times. This lack of variety produces a more mundane or boring finished work
|
GROUPING your LAYERS
|
You will need to GROUP all the layers you have made to continue
|
|
Creating MULTIPLE IMAGES
|
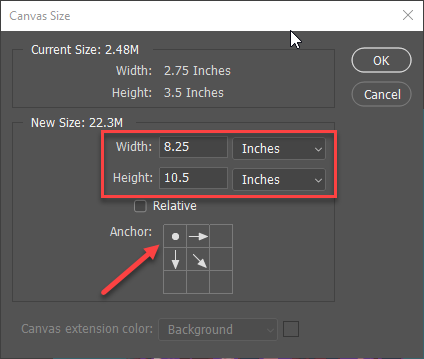
CANVAS SIZE
3(2.75" x 3.5")
In the example, it is a VERTICAL composition so the Height will be 10.5 and the width will be 8.25
8.25" x 10.5"
|
|
Copy GROUPS
|
This is where we will make multiple images by COPYING GROUPS

|
*Renaming your GROUPS and LAYERS helps you stay organized!
|
Adjusting COLORS
|
In this step you will add a variety of different colors to your project
Changing the COLOR OVERLAY LAYER

|
|
Follow the same steps to change the colors of each layer in each group
Changing colors in each group
BE SURE TO CHECK THE FOLLOWING WHEN YOU ARE DONE...
Make sure you make good color choices - this will really affect your grade - if it looks wrong, change it! It is easy to adjust - you may want to ask a neighbor to critique your choices!
Make sure to name your file exactly right: WARHOL_yourlastname with no spaces
Make sure to SUBMIT your file(s) in SCHOOLOGY for assessment! Both JPEG and PSD files
Before you turn in your file check the RUBRIC in Schoology to see what will be assessed!
ONLY WHEN YOU ARE DONE! - SAVE yOUR FILE AS A jpeg
|
In the MENU commands -
|
|
You can now turn in your work!
- Turn in both the WARHOL_Lastname.PSD and WARHOL_Lastname.JPG files into Schoology.
- In Schoology, go to:
- SUBMIT > UPLOAD > FILE(S)