
PORTRAIT RETOUCH
Here you will use precision to alter the appearance and content of a digital photographic portrait.
This lesson will utilize several new tools and techniques to accurately remove the flaws in a digital portrait.
This lesson will utilize several new tools and techniques to accurately remove the flaws in a digital portrait.
- The WORKSPACE
- Using TOOLS - particularly the CLONE TOOL, BRUSH, HEALING TOOLS
- Begin to explore making selections using the different SELECTION TOOLS
- The HISTORY PANEL and HISTORY BRUSH
- BRUSH BLENDING MODES
- DODGE (Lighten) & BURN (Darken) TOOLS
- and SAVING your files
Retouch the Photograph using selected tools, filters, styles, etc.
Correcting Mistakes
REQUIREMENTS
- ZOOM in and work very closely (if I am grading this zoomed in, you need to work zoomed in).
- Avoid making a major change; instead try several smaller changes that collectively will add up to a major change
- Double check the list of common pitfalls to make sure you are avoiding easy grade deductions - most common are stretched pixels and clone patterning - do not attempt any hand-drawn, self-created elements.
Correcting Mistakes
- sometimes it is better to redo an area from scratch than try to correct a bad alteration make good use of the HISTORY BRUSH and HISTORY PANEL
REQUIREMENTS
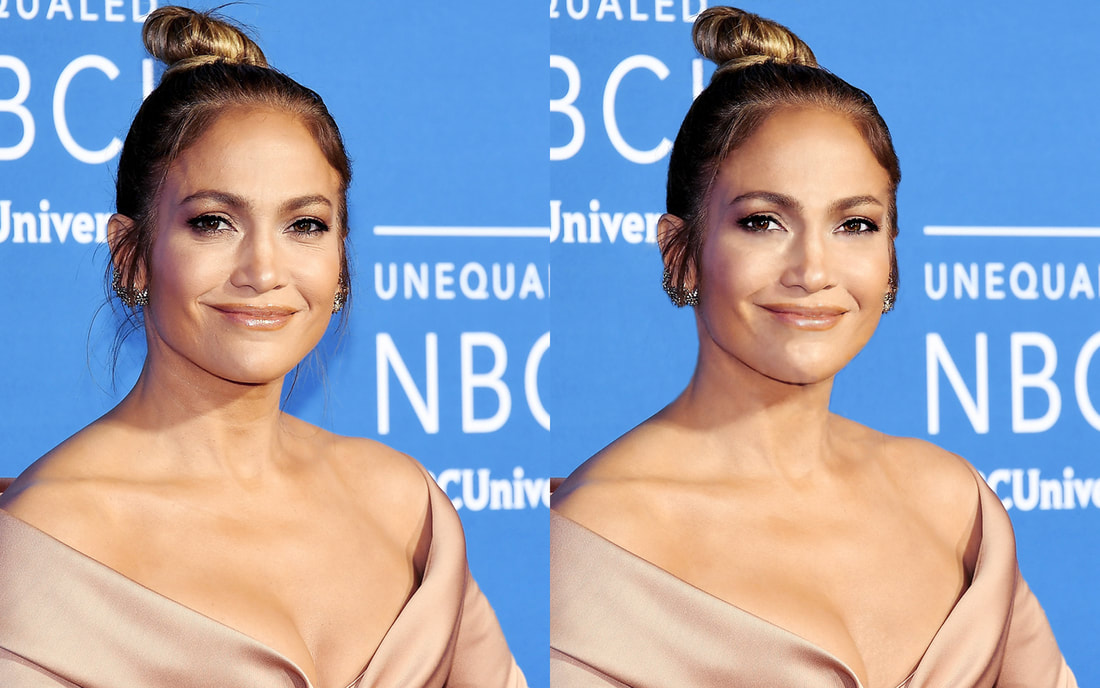
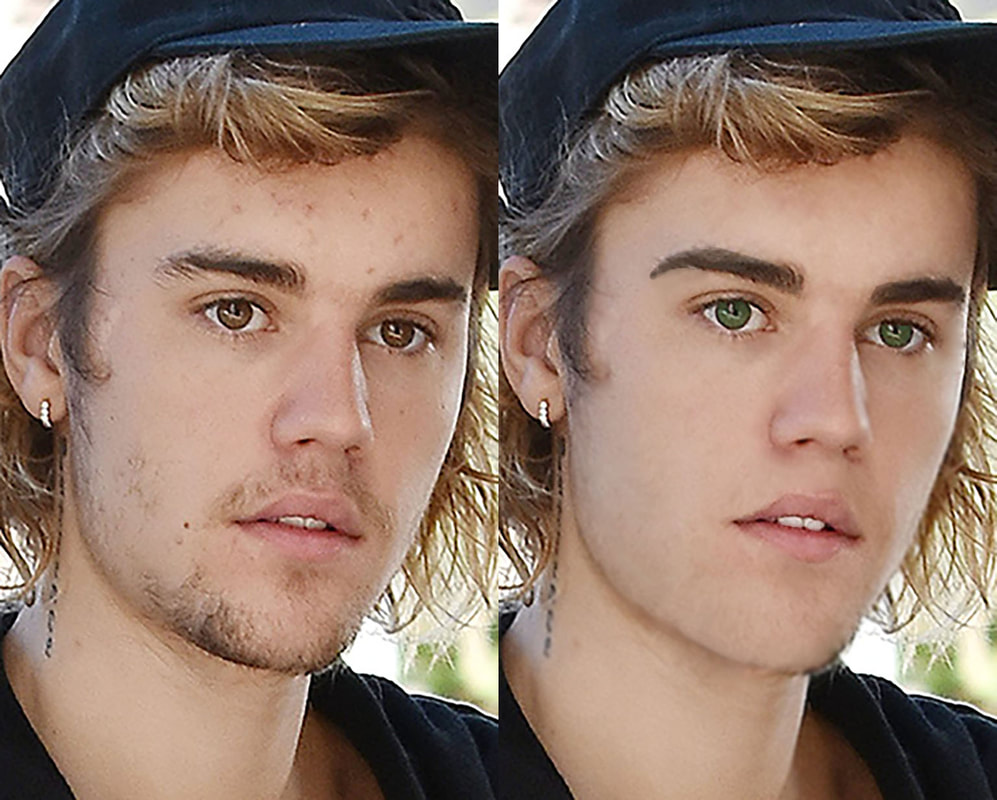
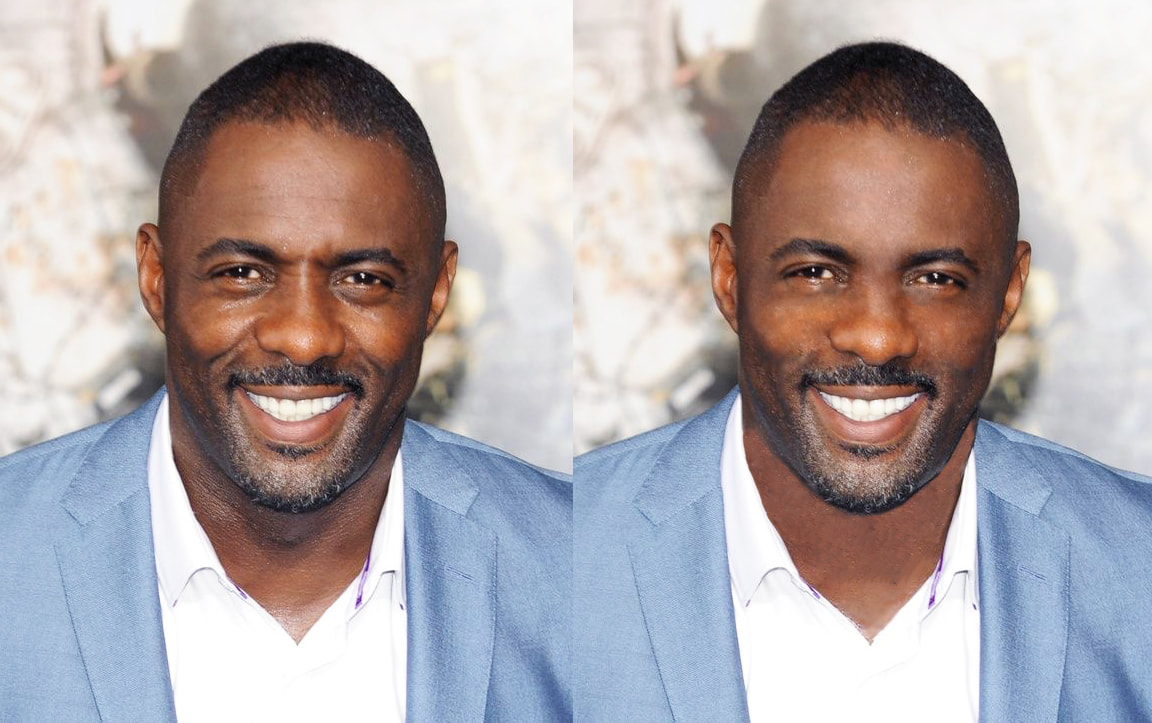
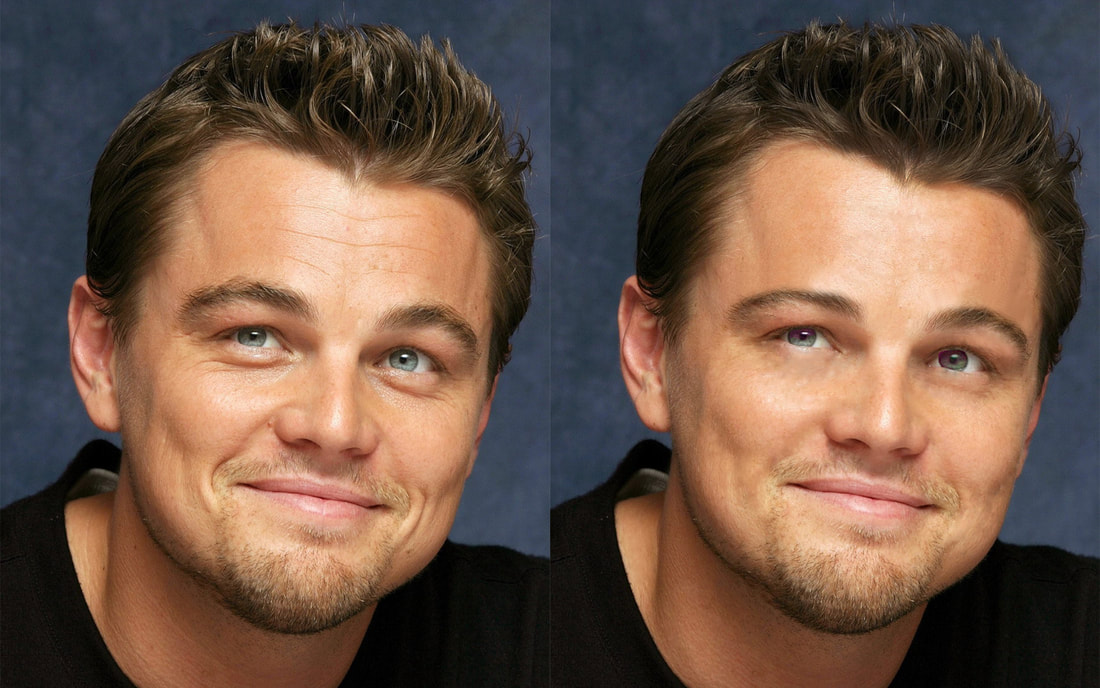
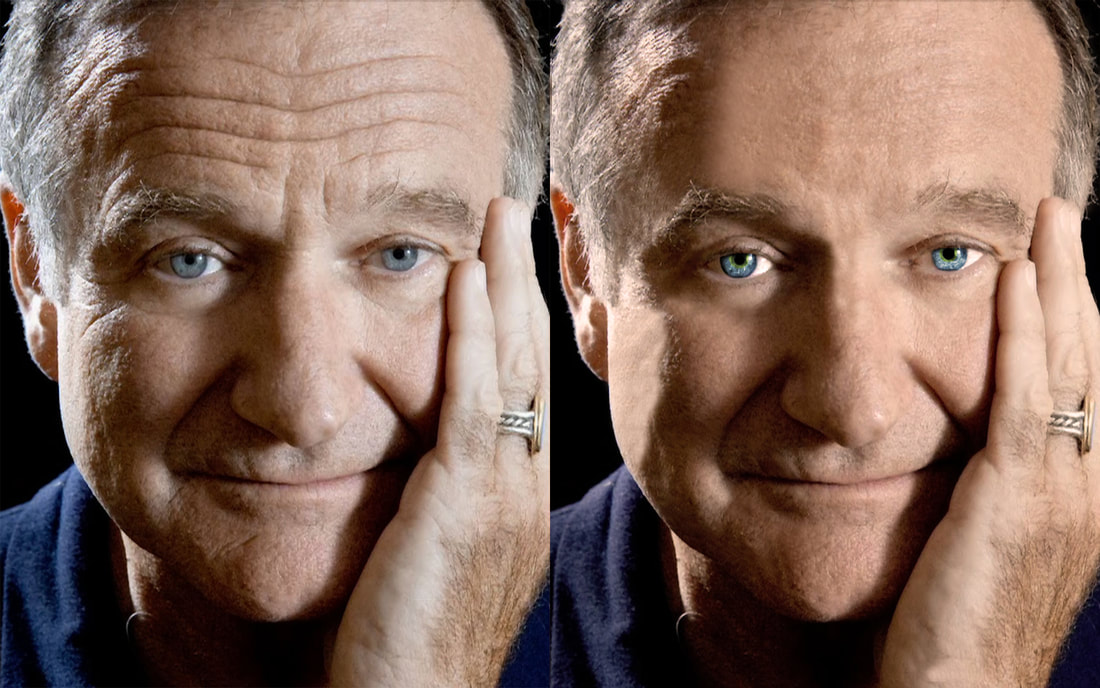
- significant enough alterations are made to create a very different image than original.
- alterations are undetectable (clean edges and transitions).
- portrait must be successfully retouched to remove blemishes.
STUDENT WORK

1. HIGH-RESOLUTION IMAGE
|
Find a "Head & Shoulders" portrait to use for the assignment
and bring your downloaded image directly in PHOTOSHOP to begin - I like when you use your own photographs for this assignment (take a picture and email it to your school account to download) Drag & Drop your chosen portrait directly into Adobe PHOTOSHOP
Use the CROP TOOL
|
|

Choose W x H x Resolution and make sure you are using inches by typing "in" also make sure that "Delete Cropped Pixels" is checked
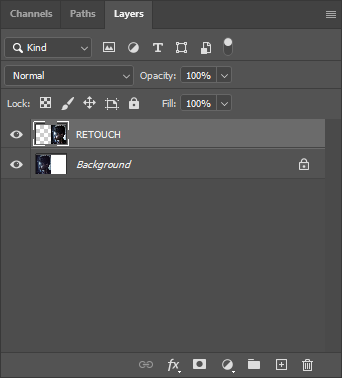
2. COPY YOUR BACKGROUND LAYER
|
Next, you want to copy your BACKGROUND LAYER - there are many ways to COPY a layer - here are two on the right.
Make sure to rename your RETOUCH layer
|
Drag you layer to the ADD NEW LAYER button on the bottom of your LAYERS PANEL
OR you can use the LAYERS PANEL OPTIONS button and choose DUPLICATE LAYER
|
3. ENLARGE YOUR CANVAS
|
Now you need to enlarge your CANVAS so that you are able place each image next to each other in the file
Go to:
IMAGE > CANVAS SIZE...
|
|
4. COLOR CORRECT YOUR IMAGE (AUTO)
|
In this step. try some basic color correction commands to improve your RETOUCH image and it's TONE, CONTRAST, & COLOR
IMAGE > AUTO TONE
IMAGE > AUTO CONTRAST IMAGE > AUTO COLOR If your image looks worse after auto adjustment just
EDIT > UNDO Or you can use the HISTORY BRUSH and HISTORY PANEL |
|
5. HISTORY BRUSH & HISTORY PANEL
The HISTORY BRUSH and HISTORY PANEL allow you to "go back in time' to fix things or make adjustments in your image
- The HISTORY BRUSH can be found on the TOOLBAR on the left
- The HISTORY PANEL is found on the right
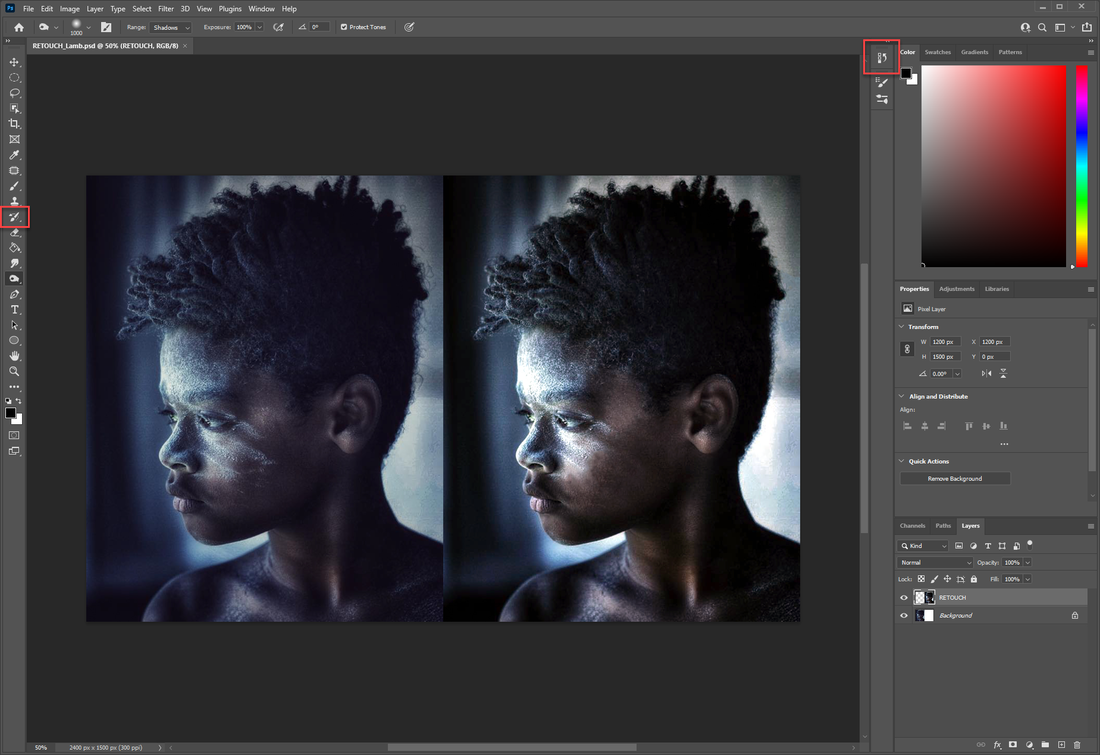
The HISTORY tool and panel locations
|
|
6. SPOT HEALING BRUSH
|
|
7. OTHER HEALING TOOLS
|
Try some of the other healing tools to improve your image quality
|
|
8. CLONE STAMP TOOL
|
The CLONE STAMP TOOL copies digital information exactly as it is and when used in RETOUCHING it is often in a very subtle way to copy textures and other elements - here I am using it to replace some of the texture of the skin and to smooth out the hairline.
To use, you must first tell PHOTOSHOP what it is you want to copy by pressing the ALT KEY (you will see a target appear) and click with your mouse. Then, move your brush over to where you are going to clone over and start using the brush. |
|
9. BRUSH BLENDING MODES
10. DODGE & BURN TOOLS
|
Use the DODGE TOOL to lighten areas of your image such as TEETH or the WHITES of the eyes (sclera)
Use the BURN TOOL to darken areas of your image

|
|
SAVE yOUR FILE AS A jpeg
|
TO SAVE AS A .PSD (Photoshop Document)
In the MENU commands -
TO SAVE AS A .JPEG (Image File)
In the MENU commands -
|
|
BE SURE TO CHECK THE FOLLOWING WHEN YOU ARE DONE...
|
Make sure to name your file: RETOUCH_yourlastname
Make sure to SAVE your file as a JPEG Make sure to SUBMIT both your .PSD file and your .JPEG file in SCHOOLOGY for assessment! Before you turn in your file check the RUBRIC in Schoology to see what will be assessed! |