
Learn how to create a selection, work with popular selection tools, and fine-tune the edges of a selection in Adobe Photoshop. In this practice assignment, you will become familiar with how to make and refine selections by trying different tools in different situations.
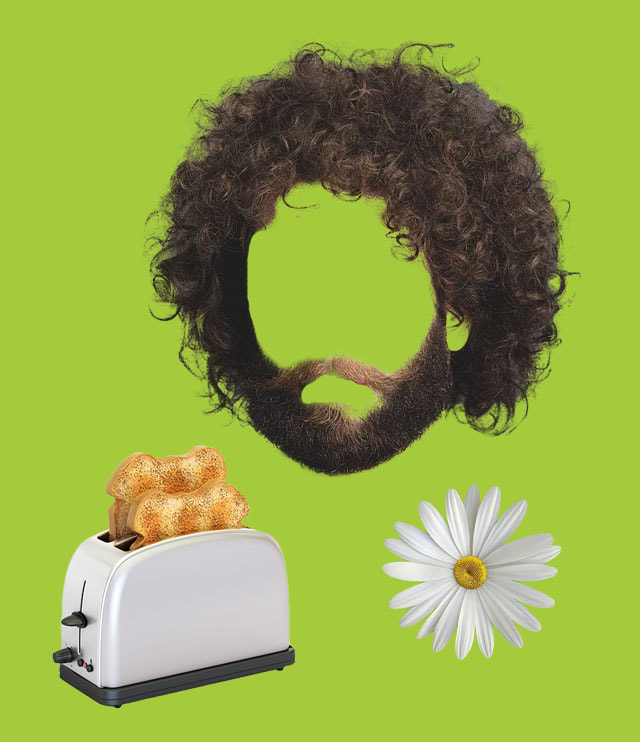
Your PRACTICE ASSIGNMENT includes selecting something:
Your PRACTICE ASSIGNMENT includes selecting something:
- GEOMETRIC
- ORGANIC
- and HAIR
|
All 3 objects should be CUT OUT of the image and placed in its own file - see the example
|
|
SELECTION TOOLS

|
There are 3 main ways to make selections
MARQUEE TOOLS
Use this tool to make geometric selections LASSO TOOLS
Use these tools to make manual selections of irregular shaped objects AUTO SELECT TOOLS
Use this to automatically make selections
|

|
Here is where you can change from
To select the opposite area-
SELECT > INVERSE You can remove your selection by going to - SELECT > DESELECT |
|
|
Using the MARQUEE TOOLS
|
|
|
Using the LASSO TOOLS
|
|
|
Using the AUTO SELECTION TOOLS
|
|
YOUR ASSIGNMENT
Google Search 3 different HIGH RESOLUTION images that contain something
- GEOMETRIC - this is something with straight edges
- ORGANIC - This is something with curved edges
- and HAIR - you will select and remove a person's hair (arguably the most difficult selection to make accurately)
|
Open each file in PHOTOSHOP at the same time
|
|
|
Use the selection tools that are effective for each object - you will often need to use several different tools to create your selection.
To remove a selection choose SELECT > DESELECT You can choose to select the background or the subject - which ever one is easier! If you select the background around your subject, you can press the delete key on the keyboard to remove it - or just use the ERASER TOOL. A LAYER MASK would work as well...choose the method you like the best! |
|
|
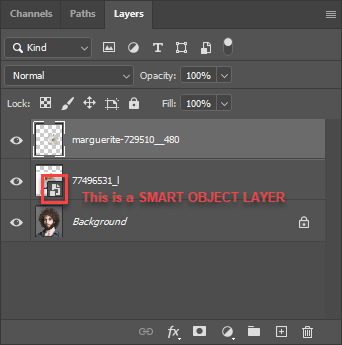
When you PLACE EMBEDED images in a file, the are often brought in as a SMART OBJECT. These types of layers need to be RASTERIZED first to use many tools like the ERASER
|
|
|
Change the size of the objects so that they all fit in your file by selecting each layer in the LAYERS PANEL and then...
EDIT > TRANSFORM > SCALE |
|
|
A great way to refine your selection is to use SELECT and MASK button - It works especially well on those difficult edges your need to select, like hair and fur.
|
|
|
To finish up, create a color BACKGROUND LAYER and save as a JPEG
File Name - SELECTION_lastname |
|
If you need more help - click the button below!